
This guide is designed as an introduction to Pastel Pencils. This is based on my own experiences of over 30 years working with the pastel pencil.
Index:
What are Pastel Pencils
Why use Pastel Pencils
What brands are available
Sharpening Pastel Pencils
Pastel Paper
Basic Principles
Erasing Mistakes
Blending Tools
Creating a Line Drawing
Simple Sky
How To Hold Pastel Pencils
Fixing Your Work
Online Classes
Pastel Pencil Basics
In this updated video recorded in 2020 we talk about the basics of using Pastel Pencils including the 4 brands that Colin works with. To watch the video click below.
What are Pastel Pencils?
Pastel Pencils are Pencils with a Pastel lead. Originally when company Schwan-Stabilo launched their range in the 80s they called them Coloured Charcoal Pencils. However as more brands introduced them as “pastel pencils”, they followed the naming trend.
Why use Pastel Pencils?
Unlike hard and soft pastel sticks, which have a certain degree of difficulty to master, pastel pencils are a lot easier to pick up and use from the start. Because they are in a pencil form, they feel already familiar to work with as we all remember no doubt using colouring pencils as a child!The difference however is in the medium, you get all the benefits of using pastel, but the control of using a pencil. This allows you to create stunning pictures with incredible detail that you would not have achieved with a pastel stick. As they are ideal for beginners and expert artists, the amount you can learn and the variety of subjects you can draw are vast.
What brands are available?
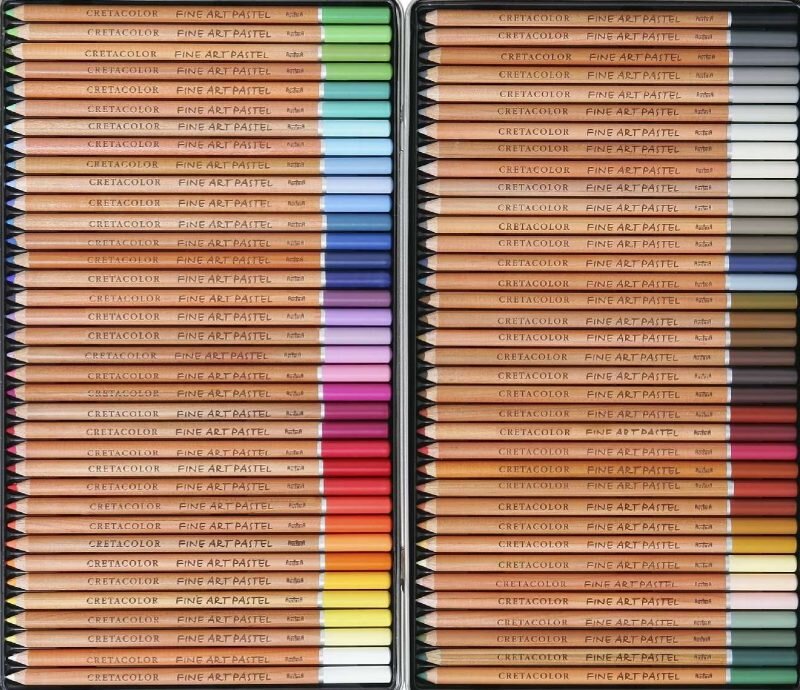
cretacolor pastel pencils

When I discovered pastel pencils some 30 years ago, there were only two brands around; CarbOthello and Conte as far as I was aware. I started using CarbOthello by Schwan-Stabilo and still find them to be a very good pencil. There were a few draw backs with these pencils after some years of using them. I found that in order to get the brightness I wanted, I would have to spray and fix the picture, then re-apply the pastel again on top. The pencil lead would also tend to crack when I was sharpening them. STABILO have since improved the product and I find I do use them occasionally now.I was approached in the early 90s by Faber-Castell who had launched their own range of Pastel Pencils with the help of a former CarbOthello employee. He knew the flaws to the CarbOthello pencils and worked with Faber-Castell to create a superior product - the Pitt Pastel Pencil.
The pigmentation in these pencils was much higher, which meant I never fixed my work from that point on (It is possible to fix the pastel pencils, though I found that it does dull the work down so I choose not to do this). They also were much more durable which meant my pencils lasted longer and weren’t so prone to breaking when being sharpened.I have used these ever since and highly recommend them as a product. I would also say that if you have other brands then this is also good because you will have a big range to draw from. I choose to mostly use the Faber-Castell brand because when I’m teaching as I can’t expect student’s to have pencils from all the various ranges.A quick word on Derwent, if you already have them then they are worth keeping and using. If you haven’t bought them yet then I would steer clear. They are no where near as durable and break very easily. This is from my own experience and many of my student’s have said the same.Very recently in my demonstrations, I started using the Cretacolor range of pastel pencils with the Faber-Castell. I have found the Cretacolor range are softer and mix very nicely with the Faber-Castell Pitt range.There are also a lot more colours in the Cretacolor range (72) compared to Faber-Castell (60). This means there are some great in between colours to choose from. Faber remains to be my favourite and most used brand.
Caran D'AcheReleased in 2017, the Caran D'Ache Pastel Pencil is a fairly new product. Even though they are more expensive, they are a very good product and I am finding that I draw from their range more often now.This is because their pigments are bright (they are a softer pastel pencil) and there are a huge 84 colours to choose from. I still use Faber-Castell Pitt as the base colours for my work then dip into the Caran D'Ache range to give the pictures a little extra pop. Especially if there's a colour I'm trying to find that they have.
Sharpening Pastel Pencils
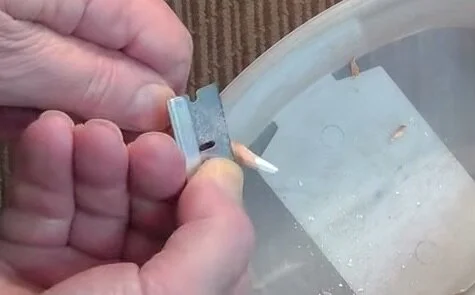
sharpening pastel pencils step 1
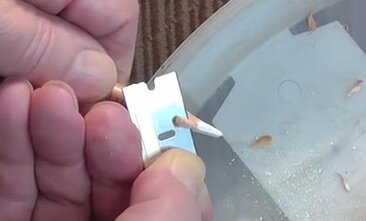
sharpening pastel pencils step 2
sharpening pastel pencils step 3
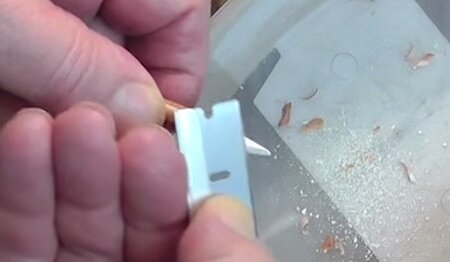
When sharpening pastel pencils, I can see the temptation to use pencil sharpeners. However in my experience this can lead to the leads cracking and being lost inside the sharpener! Therefore since the beginning I have recommended using a single edge safety razor blade or craft knife. This way you have the control over the type of point you want and how sharp you need it. There is a technique to getting this right and it will take some practice. You can find single edge safety razor blades in most hardware stores and on Amazon in big packs of 100 for a reasonable price.
Pastel Paper
In this updated video recorded in 2020 learn about the 2 different types of paper Colin uses and the differences between them.
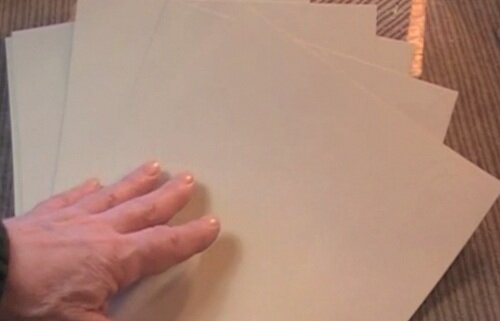
sand coloured ingres pastel paper by fabriano
There are many brands of Pastel Paper available however there is 1 that I would recommend using for beginners. It’s the Ingres paper by Fabriano in Italy, I use the Sand Coloured (although it could be argued that it’s more “Taupe”) and the 160gsm thickness.The reason why I love this paper so much is 3 fold. One, because of it’s neutral colour - there isn’t a subject that doesn’t look great on this paper. It’s perfect for skin tones, animals, landscapes and still life pictures. The colour doesn’t influence the overall tone of the picture which means your pictures can be bright and natural. Two, the “tooth” - the paper has 2 sides, a smoother side, and a rougher side with a raised “tooth”. The latter side is what I use as it creates a friction between the paper and the pastel so it grips to the paper. The texture also works great for brickwork and foliage. The last point is it’s thickness. I tend to apply quite a lot of pastel to my paintings and sometimes putting pressure on the pencil. Having a thicker paper takes this “punishment” and allows for more pastel to be applied.If you are having trouble getting hold of this paper then I do sell it in my online art shop in A4, A3 and A5 sizes.For more experienced artists PastelMat is an excellent choice of paper. It is 300gsm and so it does take more pastel layers than the Ingres. However it is virtually impossible to erase mistakes. It produces excellent results but is less forgiving. Here is a video below explaining the differences:
Basic Principles

light tones in pastel pencils

working from dark to light tones in pastel pencils
The basic principle with using pastel pencils is to work from light to dark. Soft Pastels have a much higher pigmentation which means that you can place light colours back over the top of dark. This isn’t usually the case with pastel pencils (however sometimes I demonstrate how we can do this with certain subjects and colours).This means if we want a medium tone then we start off with a light base colour and apply medium tones on top. If wanted a darker tone then we would start with a medium tone base colour and apply stronger colours on top.
Erasing Mistakes

buy double ended eraser
Another big advantage to using pastel pencils is the ability to erase mistakes. The product that I find best erases the pastel from the paper is a double ended eraser. It has two ends (obviously!), one end is soft and the other is hard. The softer end is ideal for only removing a small layer of pastel whereas the hard end will erase much stronger applications (including black) and give you a second chance at your picture.There is a downside to using the eraser on your paper. You will generally only get away with using it once or twice on the same area as every time you use the eraser, it will wear down the “tooth” of the paper which I mentioned above. This means the pastel will no longer grip to the paper and you won’t be able to carry on.
Blending Pastel Pencils
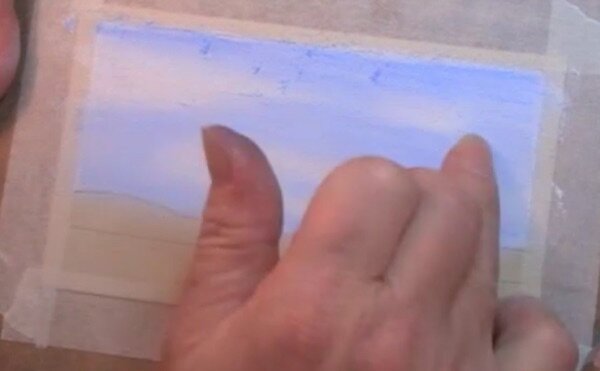
Many years ago the only option to blend colours was to use the Pastel Pencils themselves. They are of course a wonderful tool and the effects you can get are outstanding.For larger areas I did (and still do) use my fingers to blend large areas, this is good because to have control over the pressure and can ensure that the pastel really absorbs into the paper. You'll see later on in a demonstration of the sky that you can use your finger to really "push" the white base into the tooth of the paper, achieving a good solid colour.

I did sometimes use a blending stump (or paper blender) however these just did not give me enough of a blend. The real tool that changed everything was the
Colour Shaper
(pictured above). I was initially against using them because I did not think they would work (and how wrong I was!). They are a paint brush-like tool with a rubber tip at the end and the effects you can achieve are incredible.They allow you to get a smooth blend for skin tones and hair in small areas you could never achieve with a finger. Not only can you blend with these tools but the colour that is left on the rubber tip after blending can be used like a paint brush to add colour to other areas. They are easy to clean with your finger but if you want to use the left over colour on the end then you can get astonishing results.Here is another video demonstrating the colour shapers that I like to use:
Creating a Line Drawing
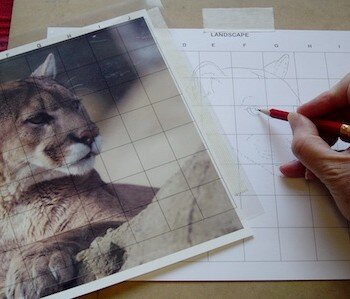
Square Drawing Transparent Grids
Generally, when you want to prepare a picture for painting, you will want to draw your outline onto your preferred drawing surface. Now if you are an amazing free-hand drawer then this isn’t a problem, however, what I recommend is using my Square Drawing Grids & Tracedown Graphite Carbons.I would use square drawing grids to create the outline on a piece of cartridge paper, then trace this image through using the Tracedown graphite carbon.Unlike other carbons, the tracedown is graphite which means you can erase your drawing after it has been transferred. I never have a problem with lines appearing on my pastel pencil work as they disappear when the pastel is applied. I would use a HB pencil to do the transfer with the carbon.Use masking tape to secure your pastel paper to your hardboard, then tape your outline drawing over the top at the top end of the picture so that you can flick between your surface and your drawing. Then place the graphite carbon in between the two and off you go. I would press gently at first, checking that the pressure is just enough to see on your pastel paper, you can always go back over the lines after with an F grade pencil.
Simple Sky
drawing a simple sky in pastel pencils

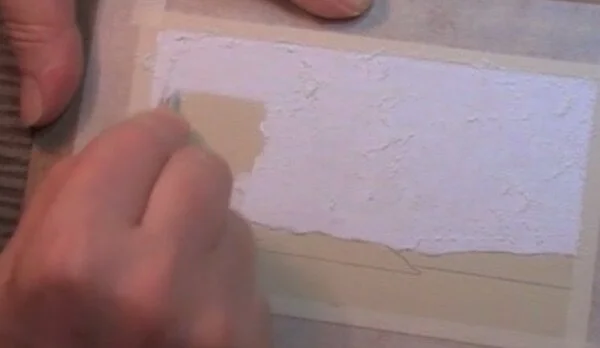
filling pastel paper with white

blending pastel with finger
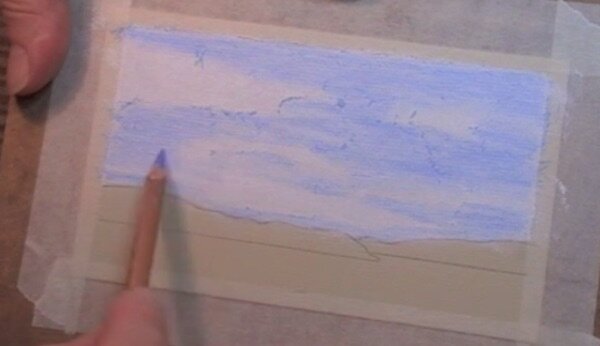
applying blue pastel pencil for a sky
second layer of blue pastel in sky
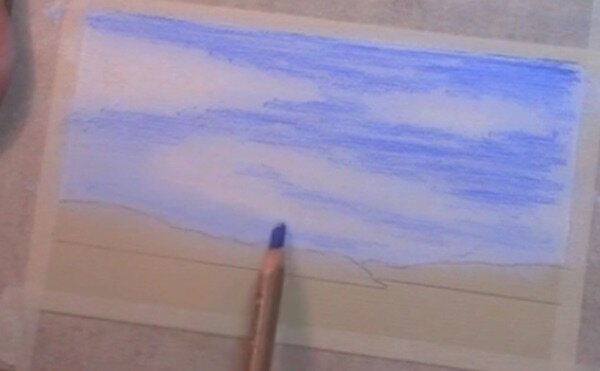
stronger blue pastel pencil in sky
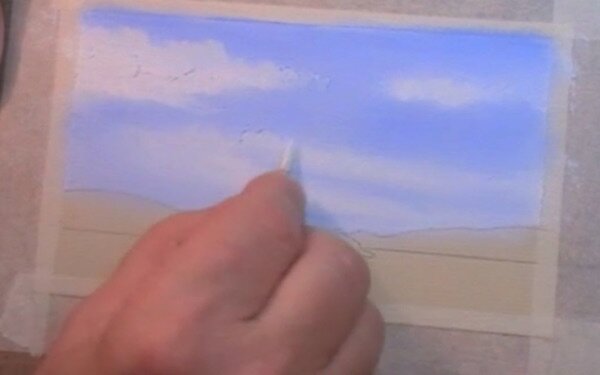
drawing clouds in pastel pencils
Let’s talk through how to do a simple sky with some clouds.Keep going back and forward with the white until you have covered the paper.We can then apply our blues. In the Faber-Castell range I am using 140 (Light Ultramarine) and 143 (Colbot Blue - a slightly stronger blue).
How To Hold the Pastel Pencil
In the 3-Part series below, Colin will show you how to hold the Pastel Pencil to achieve different effects. In the example, Colin is drawing a Cat and uses the Faber-Castell Pitt Pastel Pencils. Notice how he uses the Safety Razor Blades to sharpen the point of the pencil for drawing different sections of the picture.
Fixing Your Work
In the video below Colin discusses fixing and sealing your work. Colin chooses not to fix his artwork as he finds it dulls the artwork down and 'flattens' the picture. In the video we also discuss storing your artwork. To learn more see the video below:
Online Classes
Learn to draw and paint with Colin Bradley. Join our membership and get access to over 300+ classes.
Access to 300+ Classes
Certificate upon completion of each class
Access to our exclusive online community
Brown Bear Pastel Painting