

Putting Smoke into a Sky using Pastel Pencils

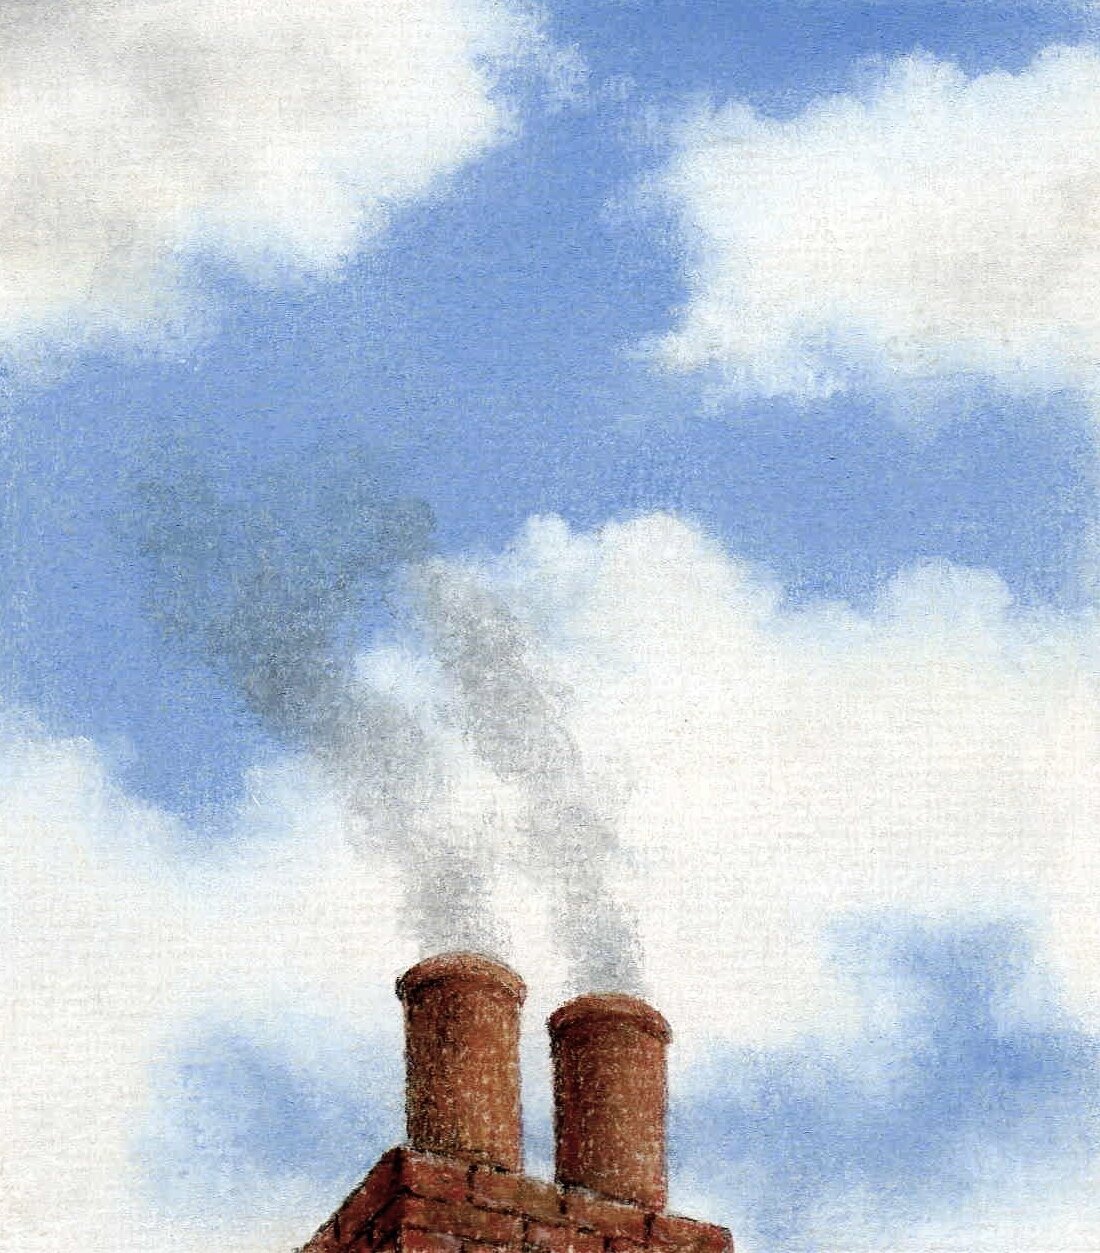 Before we look at the smoke, let's look at a traditional blue sky. First things first, you need to put down white pastel as a base. Then into the white you use ultramarine (151) or Cobalt Blue (143) from the Faber Castell Pit Pastel Pencil Range. Now once you put the blue in you have got to leave the white that you have already put in as the cloud, that's not easy as you have to do it in relief really and wrap the blue sky colour around the white cloud.If you make a mistake then the wonderful thing about pastel pencils is they can be rubbed out. This means that you could always erase some of the blue colour and reintroduce the white cloud. You will however get away with this only so far as the paper could become crushed. You will definitely get a second chance but erasing after that the paper will be spoiled.Now onto adding the smoke. The smoke goes on top of the sky (use 233) with just a hint of 181. This has to be done fairly lightly and smoke is the same as cloud, it's a puff of gas. You have to use a light touch and just wisp it in, if you try to blend this with your finger you are in trouble, you will end up blending all those colours underneath as well. The best way to blend these colours is to use a colour shaper; this will give you the control needed to ensure the colours stay true.I have done a video tutorial covering this which is in the members area. Learn how to become a member by clicking here. To purchase the colours mentioned above then you can visit our store here.